| Part | Listed price (2012) | Planning use |
|---|---|---|
| Arduino Uno R3 controller | $21.95 | The controller that runs your code. Buy this first, because every other part connects back to it. |
| Arduino Motor Shield R3 (motor driver) | $33.01 | The most expensive line, but the Arduino board cannot drive a motor directly, so skipping it is not an option. |
| Magician Chassis kit | $25 | Frame, two motors and a battery box in one purchase, which covers the frame, motors and battery box together. |
| HC-SR04 distance sensor | $6.59 | Ultrasonic ranging for obstacle detection, a low-cost way to give the robot a reaction. |
| Breadboard and jumper cables (microtivity IB401) | $8.66 | Wiring between the controller and the sensor. A small line in the budget. |
| USB cable, 6 feet | $5.49 | Links the board to the computer that runs the Arduino IDE. |
| BT2S Bluetooth to Serial Slave | $14.95 | Optional wireless control. Leave it until the robot drives and senses reliably. |
| Author’s recommended parts, total | about $115 | A planning reference for a first budget, not a quote for today’s prices. |
Prices are the 2012 Amazon listings in Miguel Grinberg’s Arduino robot hardware post, and the part roles follow Trossen Robotics’ overview of essential robot parts.
This guide shows how to build a robot for beginners with a wheeled chassis, an Arduino controller, a motor driver and a distance sensor, all matched to the power supply. Define the goal first, because it dictates every motor and sensor choice.
The wider engineering picture, from mechanics to electronics, sits in our hub on how to build a robot. This page narrows that down to one concrete first project and the decisions that make it cheaper and less frustrating.
Decisions that shape cost and compatibility
Four choices made before you order anything decide whether a first robot works on the first evening or stalls halfway. Each one has a direct effect on budget or on whether parts survive their first power-up.
- Treat the motor driver as mandatory. Grinberg’s hardware guide states that the Arduino board cannot directly control a motor, so a separate motor driver circuit has to sit between the controller and the wheels. Price-hunting here can backfire: the cheapest fully assembled shield he found, at $13.99, later needed a workaround for a design issue. A saving on the driver can cost you build time, so a beginner is better served by a board with a known track record.
- Match every part to the power system. Ponoko’s robot-building guide advises choosing electronics rated for the power system in use, because too little power and the parts will not work, while too much might fry them. In practice, read the rating on the motors, the driver and the controller before you connect a battery for the first time.
- Decide between a kit and a scratch build. The question is posed plainly in an Arduino forum thread on making robots at home: build completely from scratch, or buy a kit to program yourself. If your priority is learning code, a chassis kit is the shorter route. The Magician Chassis in the table above, for example, includes two motors and a battery box that plugs directly into the Arduino board. If you want to learn mechanical design, source the frame and motors separately and accept a longer first build.
- Write down the goal before choosing parts. Trossen Robotics’ guidance is that the robot’s goal comes first, since it dictates every motor and sensor choice. For this guide the goal is modest: a wheeled robot that drives and reacts to an obstacle.
Choosing the starter project and platform
A wheeled robot with one distance sensor is the right first project for most beginners. Forum advice in the Arduino community is blunt that wheeled or tracked robots are a lot easier than ones with legs, which is reason enough to leave legged designs for later.
Distance sensing suits a first build because it produces a visible behaviour from little hardware. Trossen Robotics lists ultrasonic sensors that measure distance to avoid obstacles among the common sensor types, and the HC-SR04 in the parts table does exactly that job at a low listed price. Once it works, the broader range of options is laid out in The 2026 Guide to Types of IoT Sensors: 15 Essential Sensors and How They’re Used.
Trossen Robotics describes six core robot parts: a controller, actuators and motors, sensors, a power supply, end effectors and a frame. Your first build covers the controller, motors, sensor, power supply and frame. It leaves out end effectors, because a wheeled robot that only drives and senses has nothing to grip or move.
The platform is not fixed either. A step-by-step basic robot guide on Scribd uses a PICAXE microcontroller, motor driver, sensors and batteries, which is the same set of part categories on a different controller. The structure of the build carries over to an Arduino controller, which Trossen Robotics notes may be enough for simple projects.
How the electronics fit together
The robot works as a chain: the sensor reports, the controller decides, the motor driver acts on the decision, and the battery feeds everything. Understanding each link makes faults much easier to isolate.
Controller and motor driver
The Ponoko guide calls the microcontroller the brains of the robot, which needs instructions so it knows how to act. Because the controller cannot run motors itself, the driver does the heavy lifting. Grinberg explains that a specialised circuit called an H-bridge swaps the power and ground inputs so a motor runs forward or backward. That is what lets two wheels turn in opposite directions for a pivot.
Power
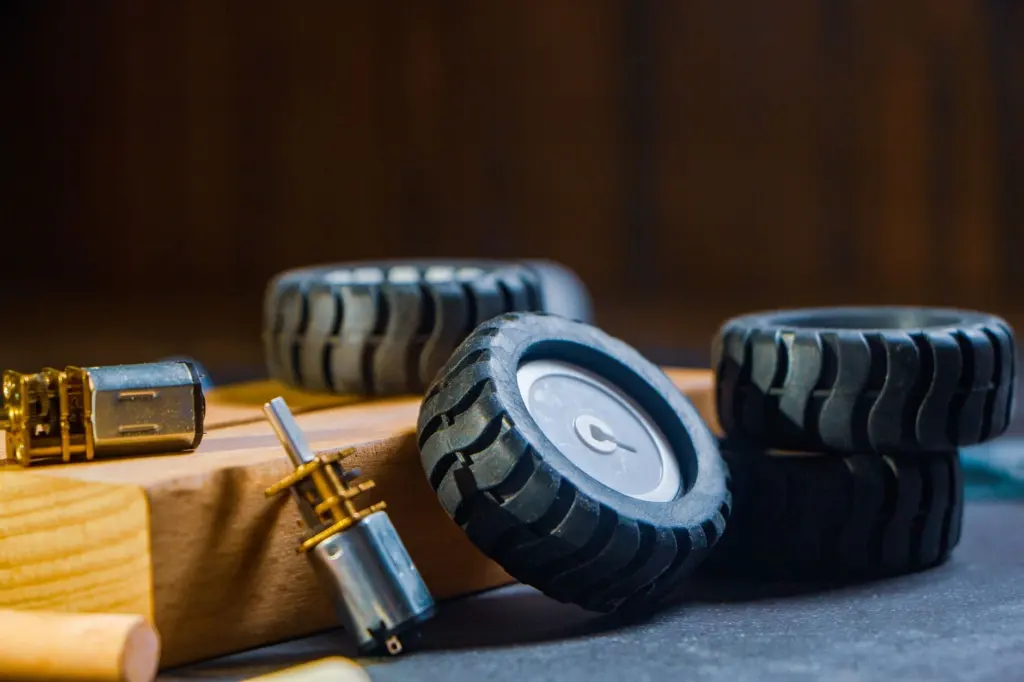
For most mobile robots, Trossen Robotics notes, the power supply means rechargeable batteries, with lithium-polymer (LiPo) packs a popular choice because of their high energy density. Sensitive electronics such as the controller need voltage regulators to receive a steady, safe supply. For a first robot, the battery box in a kit chassis spares you most of this design work.
Distance sensing
Grinberg describes distance sensors as sending an ultrasonic signal forward and waiting for the bounced signal to return. The time of the returning echo gives the estimate of distance, so the sensor must face the direction of travel with nothing mounted in front of it.
Build sequence
Work in small stages and test each one before adding the next, so that any failure points to the part you just changed.
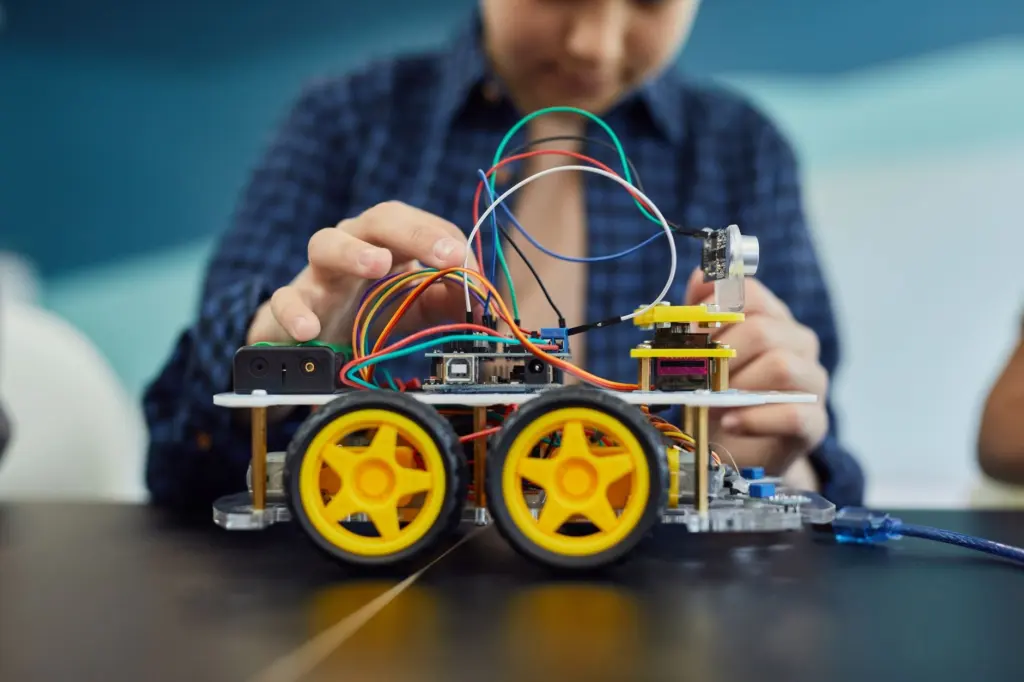
- Assemble the chassis. Fit the two motors and the battery box that come with the kit, following the kit’s own instructions.
- Place the motor driver between controller and motors. Connect the motor leads to the driver rather than to the Arduino board.
- Mount the distance sensor. Fix the HC-SR04 at the front, facing forward, and wire it to the controller through the breadboard and jumper cables.
- Connect the board to your computer. Use the USB cable and the Arduino IDE to upload a short test program.
- Run the motors alone. Confirm both wheels turn the right way before involving the sensor.
- Read the sensor alone. Check that distance readings change as you move a hand in front of it.
- Combine the two. Only then write the behaviour that links sensor input to motor output.
Programming the first robot
An Arduino-based robot uses the Arduino programming language, uploaded through the Arduino IDE, according to Ponoko’s guidance. You need to understand what the controller is being asked to do.
The same guide gives a useful example of the principle: a distance-sensing robot must be told how to take input from its distance sensor. Your first program therefore has three jobs. It reads the sensor, it decides what that reading means, and it sets the motors accordingly. Writing each as a separate piece of code mirrors the hardware testing above and keeps faults traceable.
Ponoko also points out that an understanding of electronics and microcontrollers such as Arduino or Raspberry Pi guides the choice of motors, components and power. Treat the first build as the place where that understanding starts. If the project holds your interest, How To Become A Robotics Engineer: A Practical Step-By-Step Career Guide For 2026 maps where those skills lead, and the wider robotics section has related reading.
Frequently asked questions
How much does a first robot cost?
Grinberg’s total for his recommended parts came to around $115 at the 2012 Amazon prices he listed, with the motor shield the single most expensive line. Check current prices for each part before ordering, and use that figure as a guide to proportions, not a quote.
Should I use a servo motor or a DC motor for the wheels?
Use DC motors for driving wheels. Trossen Robotics says DC motors provide continuous rotation, making them the go-to choice for driving the wheels on a mobile robot, while servo motors suit tasks that need precise angular movement, such as the joints in a robotic arm.
Do I need a Raspberry Pi instead of an Arduino?
Not for a simple first project. Trossen Robotics says that for simple projects an Arduino might be enough, and Raspberry Pi is more of an option to consider once the project outgrows that.